I’ve been dreaming about ROSEMARY BISCUITS (served over potpie)
October 15, 2009
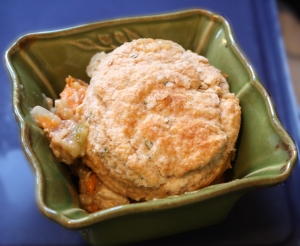
For a week prior to making this dish I couldn’t stop thinking about how delicious homemade rosemary biscuits would taste. So, I finally made them as a topping for pot pie and they were wonderful. It was the perfect meal for a crisp fall day, not to mention a good one after running a half marathon that morning in San Jose.
Making this dish is easy, simple and relatively healthy. You can substitute in any root vegetables – whatever you like. I also want to note that I used leftover chicken that I roasted a few nights before – my husband cut up a whole chicken and we roasted the pieces in a casserole dish with red potatoes, diced red onion, salt, pepper, a few sprigs of thyme and a few slices of lemon (it was delicious on it’s own and in the pot pie).
Ingredients:
1 yellow onion, diced
1 tsp olive oil
1 celery stalk, diced
2 carrots, diced
1 sweet potato, diced
1/2 cup diced jicama *
3 1/2 cups vegetable stock (omit the poultry seasoning if you use chicken stock)
1 tsp poultry seasoning
salt and pepper to taste
2+ cups bite size pieces of cooked chicken
2/3 cup flour
1 1/2 cups fat free milk
1/2 tsp minced rosemary
1 tsp salt
1 tsp pepper
*I had not intended to use jicama, but after dicing it up and realizing it wasn’t what I thought it was, i just went with it and saved the other half for a salad. The jicama actually held up really well in the potpie and provided a nice refreshing bite.
Preheat oven to 425 degrees.
1. Heat oil in a large Dutch oven. Add the onion and cook for a few minutes. Add the celery, carrots, potato and jicama and cook for an additional 5 minutes.
2. Add the stock, poultry seasoning, salt and pepper (to taste). Bring to a light boil, cover, reduce heat, and simmer for 10 minutes.
3. Add the cooked chicken; simmer for a few minutes until chicken is heated. Remove chicken and vegetables from broth with a slotted spoon and set aside in a casserole dish.
4. Increase the heat to medium. Lightly spoon flour into dry measuring cups; level with a knife. Place all but 1 tablespoon flour in a medium bowl and gradually add milk, stirring with a whisk until blended and not lumpy.
5. Add the milk mixture to the broth in the pot and cook for 5 minutes or until thickened, stirring frequently. Stir in chicken mixture, rosemary, salt, and pepper.
6. Transfer mixture back into the casserole dish (11 x 7-inch baking dish would work). and bake at 425 for 20 minutes.
Meanwhile, make the biscuits . . .
Ingredients:
1 cup whole wheat flour
1 cup all purpose flour
1 1/2 Tblsp brown sugar (white sugar would work as well)
1 tsp salt
1/4 cup chilled butter, cut into small pieces
1/8 cup minced rosemary
2/3 cup lowfat buttermilk
1 large egg
7. Lightly spoon flours into dry measuring cups; level with a knife and combine flour, sugar, baking powder, and salt in a medium bowl, stirring with a whisk.
8. Cut in butter with a pastry cutter or 2 knives until mixture resembles coarse meal. Stir in rosemary.
9. Combine buttermilk and egg in a small bowl, stirring with a whisk. Add milk mixture to flour mixture and stir just until moist.
10. Turn dough out onto a floured surface; pat to 3/4-inch-thick. Cut into round biscuits approx. 3 inches in diameter using a round cookie cutter or a water glass (like I did).
11. Remove dish from the oven and place biscuits on top.
12. Bake at 425° for 15 minutes or until the biscuits are golden brown on top and the potpie filling is bubbling.
13. Remove from oven, cool slightly, serve and enjoy!
Experimenting with New Styles
September 30, 2009
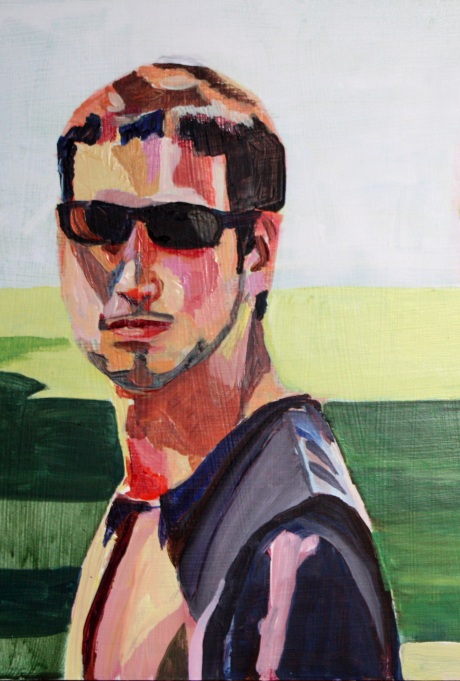
Seth - sfryjones - 11x7.5
I needed to find some way to jump start my semester of painting and figure out what I wanted to work on. So to do that I took a bunch of recycled 11×17 pieces of cardboard (an advantage of working at a design firm), painted them with gesso for a base and began experimenting with different styles. This is my first time really working with acrylics after years of oil painting, and more recently (last five years), working with watercolors. While I still prefer other mediums, I’m becoming more in sync with acrylics and feeling a little more at ease working with them.
I created the portrait above with the intent of placing solid blocks of colors and shapes together to form the figure. I think this was successful in producing a certain level of abstraction with good light and color, so I’ll continue to experiment with this style.
As another test-case, I painted this landscape with a palette knife. Painting with a palette knife takes away some feeling of control but allows for added texture and contrast. It is a great way to warm up a new semester.
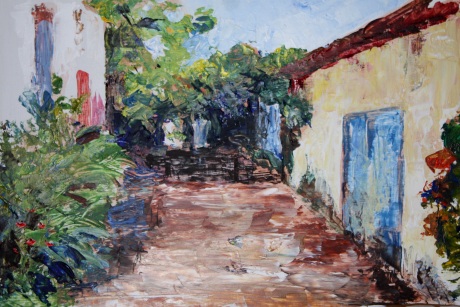
Paraty, Brazil - sfryjones - 11x17
Here are some details:

A Sad Reason for a Delicious Brunch
September 30, 2009

This post is long overdue, but luckily recipes don’t expire so I thought it would still be worth sending out. As mentioned in a previous post, our close friends Jan and DJ moved to the East Coast. We sent them off properly with a delicious brunch and a party in the park with lots of food, drinks and games.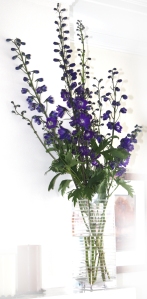
Brunch Menu:
Mimosa’s with Blueberries
Irish Coffees
Blueberry Scones
Zucchini and Olive Oil Muffins
Strawberry Jam
Flank Steak
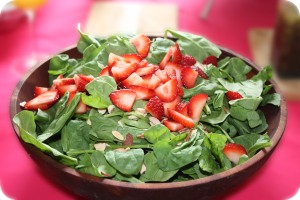
Spinach Salad with Strawberries, Almonds and Poppy Seed Dressing
Leek Quiche
Italian Sausage Quiche
French Toast Casserole
Fruit Salad with Yogurt Sauce (made by KT)
“Decorate your own” cupcakes
These are the beautiful flowers my husband gave me.
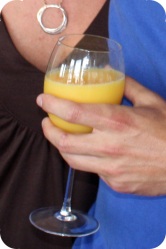
Mimosa’s
Orange Juice
Champagne
Blueberries
Fill glass with champagne, add a touch of orange juice and plop in a few blueberries . . . watch them float to the top!
Irish Coffees
Coffee (I used a French press and kept batches of coffee warm on the stove top)
Irish Whiskey
Baileys (Whiskey alternative…or try both!)
Blueberry Scones (The Cheeseboard)
Recipe from The Cheeseboard Collective cookbook (The Cheeseboard Collective is in Berkeley, CA http://cheeseboardcollective.coop/index.html)
3 1/2 c all-purpose flour
1/2 t baking soda
1 Tblsp baking powder
1/2 t kosher salt
3/4 c plus 1/4 cup sugar
1 c col unsalted butter, cut into 1-inch cubes
grated zest – 1 lemon
1 c fresh or frozen blueberries
1/2 c heavy cream
3/4 c buttermilk
1. Preheat to 375 and line a baking sheet with parchment paper
2. Sift flour, baking soda and baking powder together into the bowl of a stand mixer
3. Add the salt and 3/4 c sugar – mix low speed until combined
4. Add the butter by cutting it in on low speed for about 4 minutes until it forms into crumbs the size of small peas; complete rest of recipe by hand. (You can also use two knives or a pastry cutter.)
5. Gently mix in lemon zest and blueberries with a few strokes
6. Make a well and add the cream and buttermilk; mix briefly until just combined (some loose flour should remain in bottom of bowl)
7. Shape the dough into balls about 2 1/4 inches in diameter with a rough, rocky exterior; *See note below.
8. Place dough balls on paper 2 inches apart and sprinkle with 1/4 cup sugar on top
9. Bake on middle rack for 25 to 30 minutes until golden brown; cool on wire rack.
*Note: I made the batter a few days ahead of time and froze the scones before baking them (place the rocky balls of dough on parchment paper and freeze, then transfer to a sealed bag). The morning of the brunch I placed them on a cookie sheet and baked a little longer than directed until they were slightly golden on top.
Zucchini and Olive Oil Muffins (Michelle’s Recipe)
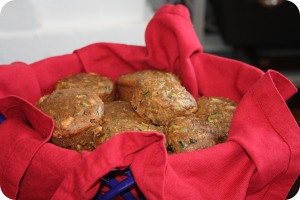
These were delicious! I’m not even going to put the recipe here, because full credit goes to my friend Michelle, who happens to be an amazing chef (by trade) – check out her recipe and website here: http://www.porktopurslane.com/2009/07/zucchini-olive-oil-muffins.html.
Strawberry Jam (Everyday Food)
1 Quart hulled strawberries
1/2 cup of sugar
2 Tablespoons fresh lemon juice
1. In a food processor, process strawberries until coarsely chopped.
2. Transfer to a large skillet and stir in sugar and lemon juice.
3. Cook over medium-high heat, stirring frequently, until jam is thickened and bubbles completely cover surface. This step took me close to 20 minutes, but could be as little as 10.
4. Transfer jam to a glass container and let cool to room temperature. You can store this jam sealed in the refrigerate for up to 10 days.
Flank Steak (Mom’s Recipe)
1.5 lb Flank Steak
3 Tblsp extra virgin olive oil
Juice of half fresh lemon juice
1-2 Tblsps parsley, chopped
2 cloves garlic, minced
Salt and Pepper
1. Spread the olive oil and lemon juice onto the flank steak. Rub on the parsley, garlic, salt and pepper.
2. Seal and refrigerate for at least an hour (overnight is ideal).
3. Cook on grill for 4-5 minutes per side or until done to liking.
4. Let rest for 5-10 minutes, then slice thinly against the grain.
Spinach, Strawberry and Almond Salad with Poppy Seed Dressing (Mom’s recipe)
 Fresh Spinach
1/2 cup of sliced strawberris
1/2 cup of sliced almonds, toasted
1/2 – 1 cup olive oil
1 Tblsp sugar
1/2 cup vinegar (I used cider vinegar, but you can use what you have on hand)
1 Tblsp poppy seeds
1 Tblsp sesame seeds
1. Whisk together oil, sugar, vinegar and seeds.
2. Place spinach in a serving bowl and drizzle with oil mixture, toss to coat.
3. Top salad with almond slices and strawberries, serve shortly after and enjoy!
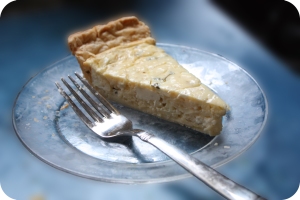
Leek Quiche
Recipe Adapted from http://www.bloomacious.com/bloomacious/2009/04/food-more-brunch-goodness-spinach-leek-quiche.html
1-2 Tblsp extra-virgin olive oil
1 white onion, diced
Coarse salt and pepper
1 leek, white part thinly sliced
1/2 cup all-purpose flour
1 tsp baking powder
8 oz. lowfat Greek yogurt
7 oz. feta cheese, crumbled
3 large eggs
Prepared pie dough
Optional ingredients (I would’ve used them if I hadn’t forgotten to put them in!):
1 cup frozen spinach, thawed
1/4 cup chopped fresh dill
1. Preheat oven to 350 degrees
2. Heat oil in a pan, medium-high heat. Add the onion with a pinch of salt, cover and simmer for at least 5 minutes.
3. Slice and was the leek by soaking it in a bowl of water; add the leek to the pan, season with salt and pepper and continue to cook, stirring occasionally, until the onions and leeks are translucent – about 8 more minutes.
4. Transfer the onion/leek mixture to a bowl and stick it in the freezer or in an ice bath to stop the cooking.
5. Line a pie dish with the pie dough. Poke holes all over and “blind bake” (http://en.wikipedia.org/wiki/Blind_bake) the dough for 8-10 minutes.
6. Sift together the flour and baking powder in a medium bowl, set aside.
7. Combine the yogurt, feta, onion/leek mixture, spinach and dill in a large bowl. Add the eggs, slightly beaten, and stir to combine. Stir in the flour mixture and add a touch more salt and pepper.
8. Pour mixture into the pie crust and tap to level it. Bake for 30 minutes.
9. Increase the temperature to 425 degrees and bake until it’s golden brown and just barely set in the middle (about 8-10 more minutes).
10. Let cool on a wire rack, serve and enjoy!
Italian Sausage Quiche
Recipe adapted from the food network.
2 Hot Italian sausages, crumbled
1 8-inch pie crust
1 cup shredded mozzarella (or other cheese of your choice)
3 eggs
1/2 teaspoon salt
1 cup heavy cream or milk
1 teaspoon dried oregano
1 large tomato, halved crosswise, seeded and thinly sliced
1. Preheat oven to 400 degrees
2. Take sausage out of the casing and saute over medium-high heat in a pan. Break up the meat as it starts to brown.
3. Line a pie dish with the pie dough. Poke holes all over and “blind bake” (http://en.wikipedia.org/wiki/Blind_bake) the dough for 5-10 minutes.
4. Remove the sausage from the pan with a slotted spoon and place on paper towels.
5. Combine the cheese, eggs (lightly beaten), salt, cream and oregano in a bowl. Mix well. Add the sausage.
6. Pour mixture into the pie crust and tap to level it. Place the tomatoes as a layer on the top of the quiche, sprinkle with additional oregano and bake for 15-20 minutes until the quiche is golden brown and just barely set in the middle.
7. Let sit on a wire rack for 10 minutes, serve warm and enjoy!
Creme Brulee French Toast Casserole
Recipe made by Patty.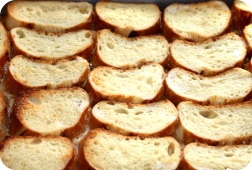
1/2 stick unsalted butter
1 cup packed brown sugar
2 Tblsp corn syrup
1 baguette
2 large eggs
3 egg whites
1 cup skim milk
1/2 cup heavy whipping cream
2 tsp vanilla
1 tsp Grand Marnier (optional)
1/4 tsp salt
1. In small saucepan, melt butter w/ brown sugar and corn syrup over medium heat, stirring until smooth. pour into 13×9 baking dish.
2. Slice bread into one inch slices. Arrange side byside in baking dish, squeezing them slightly to fit.
3. In a bowl, whisk together eggs, milk, cream, vanilla, grand marnier and salt until combined well. Pour evenly over bread.
4. Chill bread mixture, covered, at least 8 hours and up to one day.
5. Bring mixture to room temperature. Bake uncovered at 350 until puffed and edges are pale golden, 35-40 minutes.
6. Serve with real maple syrup. Enjoy!
Citrus Salad with Ginger-Yogurt Sauce
Recipe adapted from Epicurious.com (http://www.epicurious.com/recipes/food/views/Citrus-Salad-with-Ginger-Yogurt-231279).
The day of this brunch my friend KT made a different fruit salad with ginger yogurt sauce that was delicious – i just happen to have made this the next day and loved it as well, and I have the recipe handy).
1 pink grapefruit, peeled
2 large tangerines or Minneolas, peeled
3 navel oranges
1/2 cup dried cranberries
1/4 teaspoon ground cinnamon
2 cups Greek yogurt, or plain yogurt (non fat is fine)
1 Tbsp grated fresh ginger
2 Tbsp honey
1. Break grapefruit and tangerines into sections. Cut grapefruit sections into thirds; cut tangerine sections in half.
2. Transfer grapefruit, tangerines, and all juices to deep serving bowl.
3. Using small sharp knife, cut all peel and white pith from oranges. Slice oranges into 1/4-inch-thick rounds, then cut slices into quarters.
4. Add oranges and all juices to the bowl.
5. Mix in 1/2 cup dried cranberries, honey, and cinnamon. Cover and refrigerate at least 1 hour.
6. Mix yogurt, ginger and honey in bowl.
7. Spoon yogurt onto fruit.
Decorate Your Own Cupcakes!
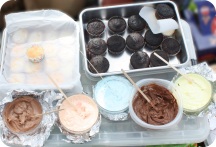
This idea came from a friend of a friend and I love it! I’m not a huge cake person, therefore I don’t ever get overly excited about making cake or cupcakes. But these were easy and removed any pressure to make them look pretty! In a few small bowls mix white icing with different food colorings. You can also mix one with a few tablespoons of cocoa powder to make chocolate icing. We made chocolate cupcakes (out of a box) and angel food cupcakes. Angel Food Cake is the one cake that I absolutely love; however, in cupcake form they aren’t as successful though still quite tasty!
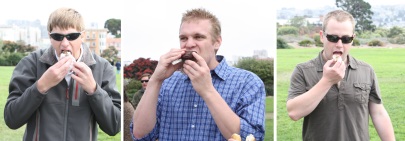
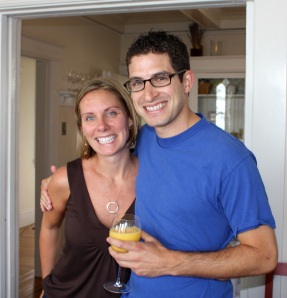
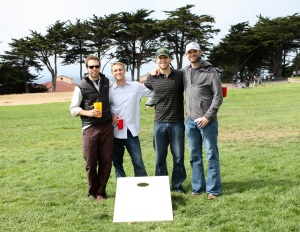
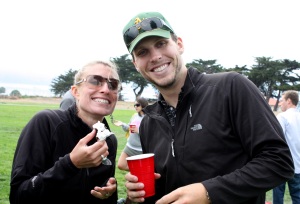
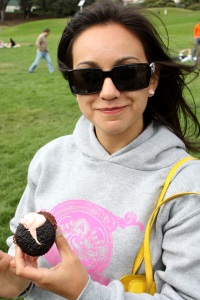
Some more pictures of the day . . .

‘
What’s YOUR process?
August 26, 2009
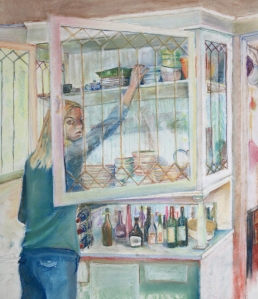
- Reaching – sfryjones
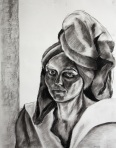
For my portraits class we had a final writing assignment that was intended to highlight our painting process and views on when a painting is complete. This assignment opened my eyes to many ideas and beneficial steps that I hope will enhance my personal process. In addition, it’s made me think about different processes within my life that might benefit from a little analysis and review! I would love to know your process, for whatever it is that you do – cooking, photography, painting, excercising . . . anything, really, please share! Below is my writing assigment in which I describe my process; and above, are a few samples of my portrait assignments throughout the summer.
My Process
The essay When is a Painting Finished? by Paul Gardener highlights the painting process of many artists and their personal thoughts on when a painting is finished. I can identify with many of these artists on different points. The following artists describe actions that are most similar to parts of my current process: Tom Wesselmann’s process of painting the image at least twice with the second layer being “intensely done”, perfecting colors and details; Fernando Botero’s creation of colors in the act of painting and his initial attraction to one color; Janet Fish’s continual growth of a painting as she works on it and final steps of hanging it on the wall in her studio; and Elizabeth Murray’s process of choosing colors and shapes.
My painting process begins with a choice in subject, followed by one or more thumbnail sketches to work out a good composition. I typically start with a light wash or pencil drawing of the subject, which provides a first layer to guide the rest of the painting. I build upon the initial “sketch” layer with layers of color and detail that bring the subject to life. My choice of colors is a spontaneous decision at first, usually inspired by something that immediately attracts me, and later develops into more deliberate choices created in the act of painting, responding to what I see at that moment. At certain points throughout painting I step back to get a different perspective on my piece. Or sometimes if I feel I’m losing momentum I’ll put the painting aside and work on another painting. Stepping back and/or walking away at stopping points allows me to continually study my work and be more critical of the content and concepts. I rely on my eye and sense to tell me when a painting is “resolved”. At this point I put it up in my studio, which is currently my dining room, for review. This gives me a chance to critique it and make minor changes, whether deliberately, or while passing by on the way to the kitchen. As Elizabeth Murray points out “it’s necessary to have paintings around, to live with them”. When I can walk by or look at the painting with a critical eye and feel that all parts of the painting are resolved, I consider my painting complete.
To me, the start and finish of a painting are very similar because of the “risk” factor. Regarding finishing a painting, Joan Snyder describes that “[i]t’s risk. A ‘risk’ can be taken when you push [the painting] further, or it can be a ‘risk’ to leave it alone”. Beginning a painting for me also incites these feelings of risk in the initial placement of color and details. So in a way, my process of completing a painting comes full circle.
My artistic process is still in flux, developing and evolving as I paint more and more. I have come away from this reading with a list of points from the artists that might improve my current process, or that I feel are at least worth a try. With this list I’ll continue to evolve my process to complete more works of art.
Our View . . . 6 months later.
August 26, 2009

The view from our apartment doesn’t get old, especially when the sky looks like this!

Did anyone catch this scene last week? These spectacular colors were a result of the smoke from the devastating fires 55 miles south of San Francisco in the Santa Cruz Mountains.

And just minutes before, the yellows and oranges were purples and pinks!
End of a class . . . beginning of a series.
August 26, 2009
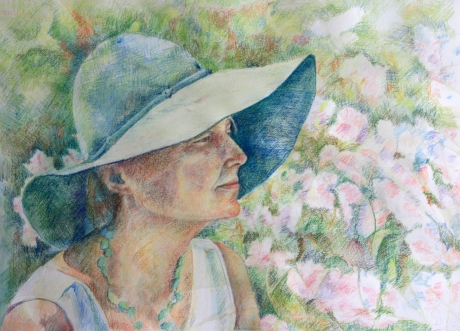
- In the Garden – sfryjones
I recently finished this piece as my final project for my portraits class. It is a portrait of my mom and now that it’s finished, I feel my grandmother’s presence coming through even though this wasn’t my original intention. The painting was created with an initial acrylic wash followed by pastels on watercolor paper. My artist-peers, before knowing the subject of portrait, felt that the painting expresses a state of peace with a very motherly sense. So I’m pleased with it and feel that it turned out a success. And, while it marks the end of my summer art class, I am hopeful that it is the beginning of a series of large portraits.
The Best of Friends
August 4, 2009

Two of our most favorite people in the world are leaving us in San Francisco (Jan is headed to business school at Yale and DJ is moving to NYC to be closer). This is a cover I made using photos and some photoshop magic (the stamp filter) for a little guest book. We threw them a great brunch and day-drinking party in the park . . . recipes and more stories coming soon.
It’s amazing to me how at every chapter of my life I’ve found incredible people that become lifelong friends and Jan and DJ are two of these very special people. We’re going to miss them so much – one day we’ll all be back in sunny California together . . . or so I hope!
Daddy’s Girl
August 4, 2009
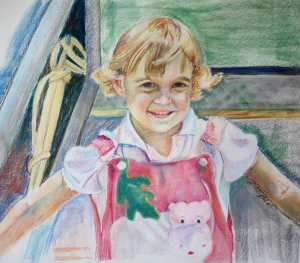
Daddy's Girl - sfryJones, July 2009
This pastel drawing, which is still a work in progress, is a self portrait of me as a child. I’m not quite sure I fit the definition of a “Daddy’s Girl”, but I certainly always wanted to be one!
Creating a self-portrait of myself as a child was an interesting experience since it brings up a lot of memories. There are two distinct aspects to a portrait painting or drawing (among many others) – the factual and the conceptual. The factual is simply the true figure as one sees it. This part of painting or drawing tends to come relatively easy to me (with time) and I’m fairly pleased with how the figure (me) in Daddy’s Girl has turned out. The conceptual aspect of a painting is the more intangible – the emotional undercurrent or the symbolic nature behind the work that seeks to capture its meaning and truly make it a piece of art as opposed to a copy of a photograph. This is something I tend to struggle with a bit, but I have been working on more and more. While creating Daddy’s Girl, I spent a lot of time thinking about what might have been running through my mind when this photo was taken, who took the photo (most likely my Mom or Dad), and the rope in the background that screams “boats”…and also means I was hanging out with Dad. This helped me think about the painting more conceptually, however I still would like to enhance the mood of the painting by finishing the background and making some other minor color adjustments. This drawing brings up many fond memories of family time spent on the water in Maryland. Lucky for me, these memories will come to life soon as I’m about to head there for a long weekend in a couple of days, which I’m very excited about.
Wedding in Rye
July 16, 2009
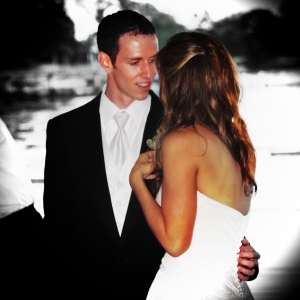
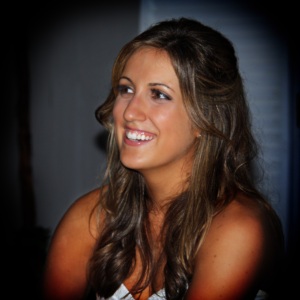
Andy and Lacey closed out our Duke couples wedding streak with a wonderful celebration. Even with a few drizzles and not much sun, everything about the evening was beautiful, especially Lacey who was glowing all night. I think we’ll all go through a bit of withdrawal without another Duke wedding on the books, but we have lots of great memories and photos to keep us going!
I had some fun with the photos using techniques from http://tutorialblog.org/.
Self Portrait
July 15, 2009
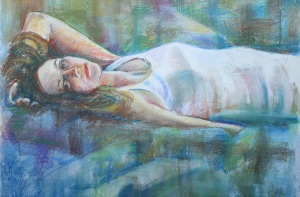
Suzanna
vs.
Ophelia
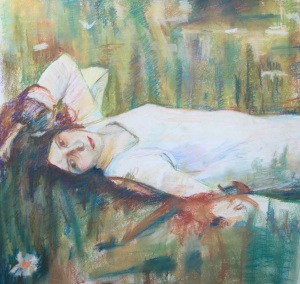
My latest portrait class assignment was to study a Master’s portrait (bottom image) and then create a self portrait in the same style. This has been an active way for me to study the technique and style of John William Waterhouse (http://en.wikipedia.org/wiki/John_William_Waterhouse). His portfolio includes numerous paintings of female characters from mythology and literature, which are incredible in their ability to capture the mood of the women.
A little more on Master Studies . . . My teacher, Glenn Hirsch, has such wonderful insight. I don’t know why I hadn’t thought of this before – a master study in art is like playing Beethoven or Bach on the piano. By mimicking and perfecting the work of the masters, you gain incredible technique and insight that can improve your own creative work. It’s so important to study art history in the process of creating art or our own; this is something I often overlook but am hoping to improve.